
Make your own Christmas Wreath
- Miray Yalcinkaya

- Nov 30, 2020
- 2 min read
This year, It's time to explore the DIY world of wreaths with a twist of ferns, pines, eucalyptuses, and earthy flowers & make a wild impression!

Our favorite season is around the corner...
To kick off December and to get into the holiday spirit, we've decided to inspire with a traditional Christmas Wreath with a modern twist. We know not everyone has the time to create their own, so we generally end up buying ready ones from the market - end up spending $$ and looking all the same. If you feel you want something different this year, then you're not alone!
Only a few materials needed.
We've decided we wanted something wilder, natural, and unique and luckily found this grapevine base that matches our needs. Depending on the look you want to achieve, you can decide to use other bases. The items that we've used making this particular wreath is below, along with some alternatives. You'll find all the supplies you need for this DIY at stores like Hobby Lobby and Michael's. Or you can visit your local floral store to see if they have any dried flowers and foliage, and get creative with the base by finding something you can use as a ring!

MATERIALS NEEDED:
A circular base - We've used a sunburst grapevine wreath.
Floral wire (green or brown colors)
Scissors
Any greenery, foliage, dried florals of your choice.

// BASE OPTIONS
We knew we wanted something wild, that's why we choose the sunburst shaped base. If you wish, you can choose other bases such as a classic grapevine wreath or metal wire frame.
// GREENERY OPTIONS
If you are a fan of ferns and earthy flowers just like us check out the list of foliage we've used making this particular wreath; green lace fern, flocked dragon fern, purple flowers, and some Christmas florals mixed with berries or other arrangements.

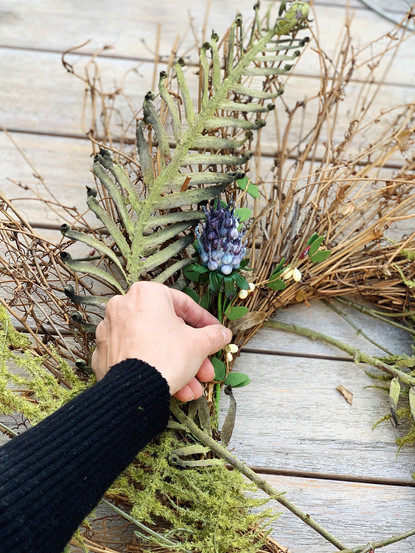


Planning is everything...
Lay your circular base on a flat surface and make sure it's stable. The planning starts here; it's important to decide on the arrangement of the florals before you start to tie up with the wire. In other words 'make a blueprint of your foliage'. If you are uncertain, it's always easier to start with bigger and wider greenery and go clockwise, place the smaller ones on top as you go. Once you decide and happy with the placement, time to tie things up so that your wreath is stable. Don't forget to take a photo so you can refer as you work along. After you are done with the wiring, make sure everything is in place and stable. Create a hook on the back of your wreath by tying off a circle of floral wire. and Voila! Your wreath is ready to be placed on your front door, on top of your fireplace, or any wall of your choice.


Happy crafting!
Be sure to tag us on instagram @camara.design once your wreath in hung. Can't wait to see your twist and your designs.


Comments